


Robo R2 Z-Board Installation
How to install the new Robo R2 Z-Board:
This article is provided for informational purposes only. Always have a qualified technician work on your 3D printer.
Never leave your 3D printer unattended while it's running.
Step One – Remove your old R2 mainboard
- With the printer on, use the menu commands to raise the bed to the top of the printer so it is close to the nozzle.
- Shut down your printer
- Important: Be sure to always shut down your Robo R2 using the shutdown command on the touch screen or through the Octoprint interface on your web browser. Wait for the LCD screen to go blank and then switch the printer off using the rocker switch on the back of the printer. Failing to shut down the R2 properly can damage the onboard computer
- Once your printer is properly shut down, remove the power plug from the back of the printer
- When your printer is safely unplugged, remove the bottom hatch and hatch cover from inside the printer (picture)
- Unplug all the wires from the R2 mainboard
- Remove the 4 screws holding the mainboard in place and remove the mainboard. Be sure to keep the screws to be used with your new board.
Step two – Install new board.
Important: The extruder main harness is wrapped in a silver foil that is conductive. This could cause a short if the foil touches the mainboard. It is a good idea to remove about 10 inches of the foil wrap to make sure this does not happen. Alternatively, you could wrap the section of wiring harness that is near the mainboard with a nonconductive material.
1. Place the new board in the printer and reuse the old screws to fasten it in place.
2. Connect the bed heater into the orange 4 pin plug.
3. Connect the hotend heater wire (the blue plug) into the green 2 pin plug.
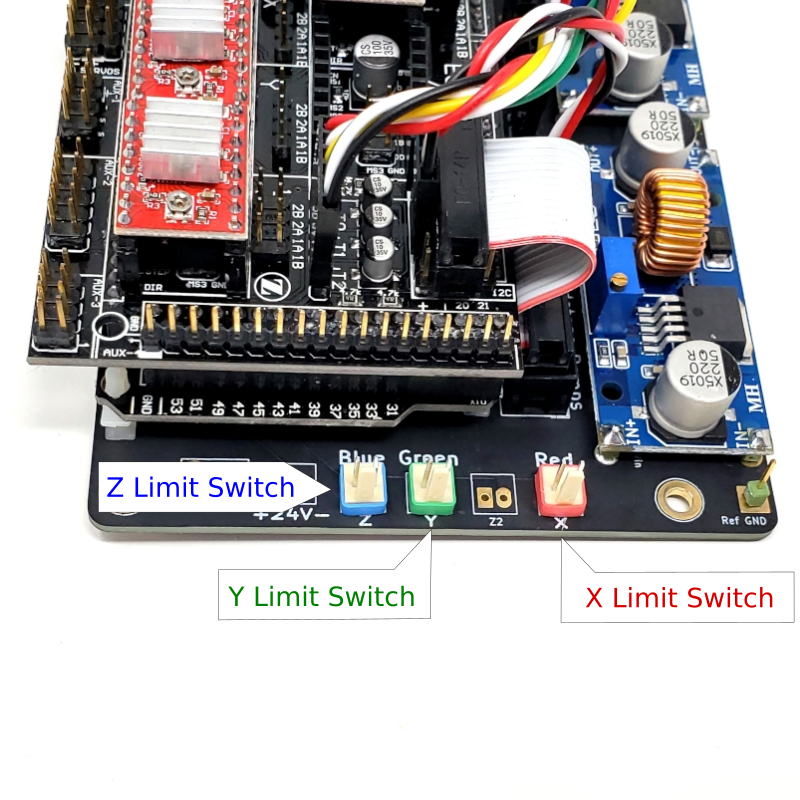
4. Connect the remaining wires using the pictures below as reference.
Note: It is easy to plug the stepper motor wires in backwards, so if after you have completed installation, you find any of your stepper motors are running in the wrong direction fully shut down and unplug the printer and then reverse the plug of the affected motor. Do not do this while the printer is on.

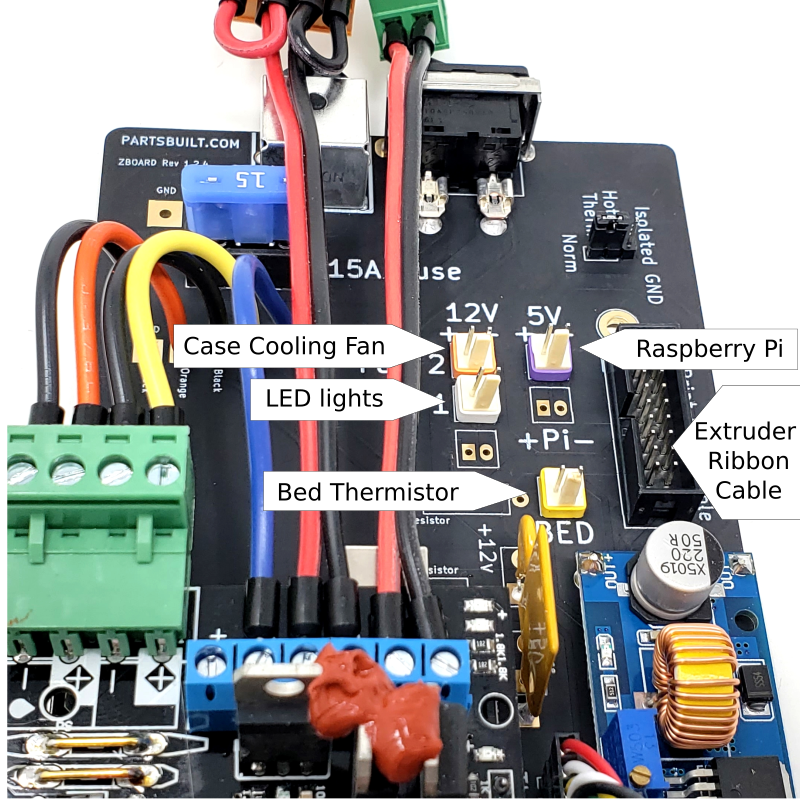

Connect the Raspberry Pi USB cable to the Arduino board just under the Bed and Hotend power supplies - circled in photo above
Step Three – final calibration (use the LCD panel)
- Attach the power cable and turn your printer on
- Home XYZ - Printer>Motor Controls>Home
- Set Z offset - Utilities>Wizards>Z-Offset
- Level the bed - Utilities>Wizards>Bed Calibration
- Set Z offset again - Utilities>Wizards>Z-Offset
- Fine Tune Z offset - Utilities>Wizards>Fine Tune Offset
- PID tune the bed and hotend - Utilities>Wizards>PID Tuner
You’re done!
Recent Posts
-

Artillery 3D Printer Parts Now Available!
We happy to announce that we are now stocking parts for Artillery 3D printers. Click on the link …Jul 21, 2022 -
What is the "Genuine Part Badge"?
We have created a Genuine Part badge for our product pages. These badges indicate the item is a …Jul 14, 2022 -
How tight do I tighten the thumbscrew on my Bondtech extruder?
Many people ask about how to properly tighten the thumbscrew for the filament tension lever …Jun 08, 2022